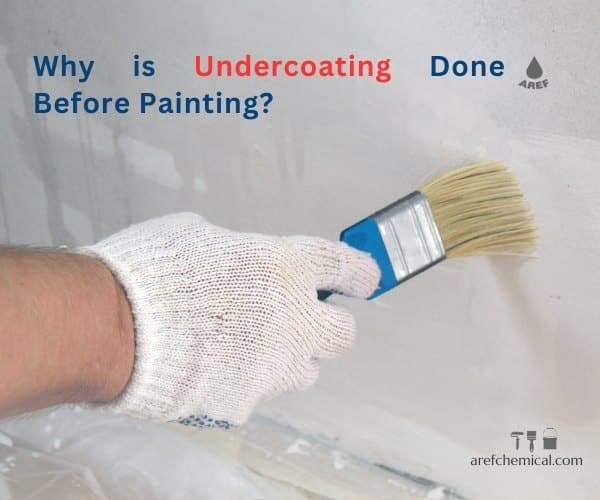
The undercoating of paint in building painting is performed before applying the final color to wall surfaces, ceilings, or other surfaces. This process is essential for creating a smooth, even surface free of any defects or irregularities, and it helps improve the quality and adhesion of the final paint to the surface. Undercoating in building painting can help improve the appearance and durability of the building’s paint job. There are various types of undercoating, each suitable for specific surfaces and conditions. In this article, we will discuss the most common types of wall and building undercoatings.
Why is Undercoating Done Before Painting?
Undercoating the wall before painting is done to enhance the adhesion and durability of the wall paint. Without undercoating, the paint does not adhere well to the wall surface and can gradually become scratched and deteriorate over time. By applying an undercoat, a layer of base coating is created on the wall surface, which helps the wall paint achieve optimal adhesion and prevents scratching and deterioration.
Additionally, wall undercoating serves as a base layer for the wall paint. Wall paint consists of a coloring agent and a base material that acts as a thinner. With the application of undercoating, the adhesion between the paint and the base coating is improved, resulting in a better finish on the wall surface.
Therefore, performing undercoating before painting is considered an essential and important process in the interior and exterior decoration of buildings.
Steps for Undercoating in Building Painting
Undercoating in building painting is a crucial step in the painting process that prepares the surface for the final coat of paint. This process improves the quality and durability of the final paint and includes several different stages:
1. Surface Preparation Before Undercoating:
–Cleaning the Surface: First, you need to remove all dirt, dust, grease, and grime from the surface. For this, you can use suitable cleaners such as water and soap or specialty cleaners for various surfaces. If there is any mold or fungus, use an appropriate anti-fungal treatment.
– Clearing: The area to be painted must be cleared of any dust, grease, grime, and contaminants. You can use a brush, vacuum cleaner, or appropriate cleaner for this task.
– Surface Repair: Fill any cracks, holes, or unevenness in the surface with suitable putty or mortar. After the putty has dried, sand the surface to smooth it out.
– Sanding: Sand the entire surface with appropriate sandpaper to create a rough and uneven texture. This sanding helps create a smooth and uniform surface, improving paint adhesion and preparing the surface for the next steps.
– Priming: Applying a primer acts as a base layer for the final paint and aids in better adhesion. The type of primer suitable depends on the surface and the final paint. The primer protects the surface from moisture and damage. Apply the primer evenly using a brush or roller. After the primer has completely dried, you can proceed to apply the final coat of paint. In some cases, an additional layer of primer may be needed to ensure complete coverage and readiness for the final color.
Final Review and Correction: After the primer has dried, the surface should be inspected, and any irregularities or defects should be corrected as needed. This step may involve resanding and using putty if necessary.
Once these steps are completed, the surface will be ready to receive the final coat of paint. Proper and careful undercoating ensures that the final paint adheres well and exhibits greater durability and beauty.
3. Choosing the Right Color:
Type of Paint: Select the appropriate type of paint based on the surface type and intended use. For example, oil-based paints are suitable for wooden and metal surfaces, while acrylic paints are suitable for various surfaces, including plaster, brick, and drywall.
Color: Choose your desired color based on personal taste and the décor of your home.
4. Painting:
Application: Apply the paint evenly to the surface using a brush, roller, or sprayer. For the best results, two or three coats of paint are typically needed.
Drying: After each coat of paint, allow sufficient time for it to dry completely. The paint’s drying time depends on the paint type, the thickness of the layer, and the environmental conditions.
How to Prepare for Acrylic Paint:
First, clean and smooth the surface you want to paint on to prepare for acrylic paint. Then, use a primer that is best suited for preparation with acrylic paint. The primer moistens the surface and creates a suitable base to which the acrylic paint can adhere.
After the primer has dried, you can proceed to apply the desired acrylic paint. Be sure to ensure that each layer of acrylic paint dries completely before adding the next layer. This will help to enhance the quality of your painting and prevent any unwanted shadows or dark spots.
How to Prepare for Oil Paint:
To prepare for oil paint, follow these steps:
- Clean and smooth the surface you want to paint to remove any dust particles and unevenness.
- For preparation with oil paint, use an oil-based primer or an oil-based undercoat, which is the best option for this purpose. An oil-based primer not only creates a suitable base for the paint but also helps to prevent the paint from being absorbed by the surface.
- After mixing the primer, apply it evenly to the surface using a brush and allow it to dry completely.
Once you have completed these steps, you can proceed to your oil painting. However, it’s advisable to start with paintings that have a limited color palette to familiarize yourself with the techniques and methods of oil painting.
Preparing for Epoxy Paint:
Preparing for epoxy paint is a vital step to achieve a high-quality and durable coating. The preparation process includes the following steps:
- Surface Preparation: The surface to be painted must be thoroughly cleaned and free of any dust, grease, oil, and contaminants. This is typically done using a grinding machine.
- Repairing Cracks and Holes: Any cracks or holes on the surface should be filled and smoothed using appropriate materials, such as epoxy putty.
- Applying Primer: After cleaning and repairing the surface, a layer of epoxy primer is applied. This layer helps improve the adhesion of the epoxy paint and prepares the surface for subsequent layers.
- Applying Epoxy Layers: Once the primer has dried, the epoxy layers are applied in sequence. Each layer should dry thoroughly before applying the next.
These steps will help you achieve a high-quality and durable epoxy coating.
Important Points for Preparing Interior Paint:
– Use high-quality tools and materials.
– Carefully read and follow the instructions related to each product.
– Wear a mask, gloves, and protective eyewear while working.
– Ensure suitable environmental conditions, such as optimal temperature and adequate ventilation, for the task.
Types of Interior Paint Preparation:
– Gypsum Preparation: This type is suitable for gypsum and brick surfaces.
– Cement Preparation: This type is suitable for cement and concrete surfaces.
– Wood Preparation: This type is suitable for wooden surfaces.
– Metal Preparation: This type is suitable for metal surfaces.
Tools and Materials Needed for Preparing Interior Paint:
To prepare for interior painting, the following tools and materials are required:
– Brush, roller, bucket
– Filler (putty)
– Sandpaper
– Primer
– Cleaner
– Gloves, mask, protective eyewear
By correctly preparing the surface for painting, you can ensure better quality and durability for the final paint. Additionally, note that the type and amount of materials and tools needed for preparation depend on the condition and type of the surface being prepared, so there may be a need for other materials and tools as well.
Conclusion
In conclusion, Undercoating the surface for interior painting is a crucial and essential step that contributes to the better quality and durability of the final paint. Proper preparation can make surfaces smooth, uniform, and ready for the application of the final coat. This process helps improve the appearance and useful life of the building’s paint and can serve as a solid foundation for any subsequent painting work. The importance of executing this step correctly should not be overlooked to achieve the best possible results for the painting project.


16 Responses
thanks
https://daroosf.com/%D9%85%DA%A9%D9%85%D9%84-%D8%A8%DB%8C%D9%88%D8%AA%DB%8C%D9%86/
good information
https://daroosf.com/%D9%85%DA%A9%D9%85%D9%84-%D8%A8%DB%8C%D9%88%D8%AA%DB%8C%D9%86/
great
https://tavatranslation.com/%d9%85%d9%87%d8%a7%d8%ac%d8%b1%d8%aa-%d8%aa%d8%ad%d8%b5%db%8c%d9%84%db%8c-%d8%a8%d9%87-%d9%81%d8%b1%d8%a7%d9%86%d8%b3%d9%87/
i enjoyed
https://tavatranslation.com/%d9%85%d9%87%d8%a7%d8%ac%d8%b1%d8%aa-%d8%aa%d8%ad%d8%b5%db%8c%d9%84%db%8c-%d8%a8%d9%87-%d9%81%d8%b1%d8%a7%d9%86%d8%b3%d9%87/
fantastic
https://tavatranslation.com/%d9%85%d9%87%d8%a7%d8%ac%d8%b1%d8%aa-%d8%aa%d8%ad%d8%b5%db%8c%d9%84%db%8c-%d8%a8%d9%87-%d9%81%d8%b1%d8%a7%d9%86%d8%b3%d9%87/
i agree with you
https://tavatranslation.com/%d9%85%d9%87%d8%a7%d8%ac%d8%b1%d8%aa-%d8%aa%d8%ad%d8%b5%db%8c%d9%84%db%8c-%d8%a8%d9%87-%d9%81%d8%b1%d8%a7%d9%86%d8%b3%d9%87/
good luck
https://tavatranslation.com/%d9%85%d9%87%d8%a7%d8%ac%d8%b1%d8%aa-%d8%aa%d8%ad%d8%b5%db%8c%d9%84%db%8c-%d8%a8%d9%87-%d9%81%d8%b1%d8%a7%d9%86%d8%b3%d9%87/
nice article
https://qomtamirat.com/
https://qomtamirat.com/
so useful
https://qomtamirat.com/
Just do it
Exactly 👍🏼
Always use the right brush
Thanks 🙏🏽 good points for pointing
The surface to be painted should be cleaned and any dust, grease, oil.
🙏🙏🙏🙏🙏🙏
https://qomtamirat.com/